Our Design & Production Process
From designing together at home to final delivery, we keep every step clear, comfortable, and transparent.
01
Design Comfortably at Home
Use our online design tool to create and edit the memorial together with your family, at your own pace.
02
Gentle AI Assistance
Receive optional suggestions for wording, epitaphs, and meaningful symbols whenever you need help.
03
Submit Your Design for Review
Our team reviews the technical details and prepares a detailed design proof for your approval.
04
Review & Confirm
Review the proof, request any final refinements, and approve the design before production begins.
05
Careful Craftsmanship
Your memorial is carefully created by combining traditional craftsmanship with modern precision, followed by a thorough quality inspection.
06
Delivery & Installation Support
We provide clear delivery updates, realistic timelines, and detailed installation guidance and support.
Detailed Step-by-Step Guide for the Design Tool
Here is the recommended screen-by-screen flow for the Design Tool
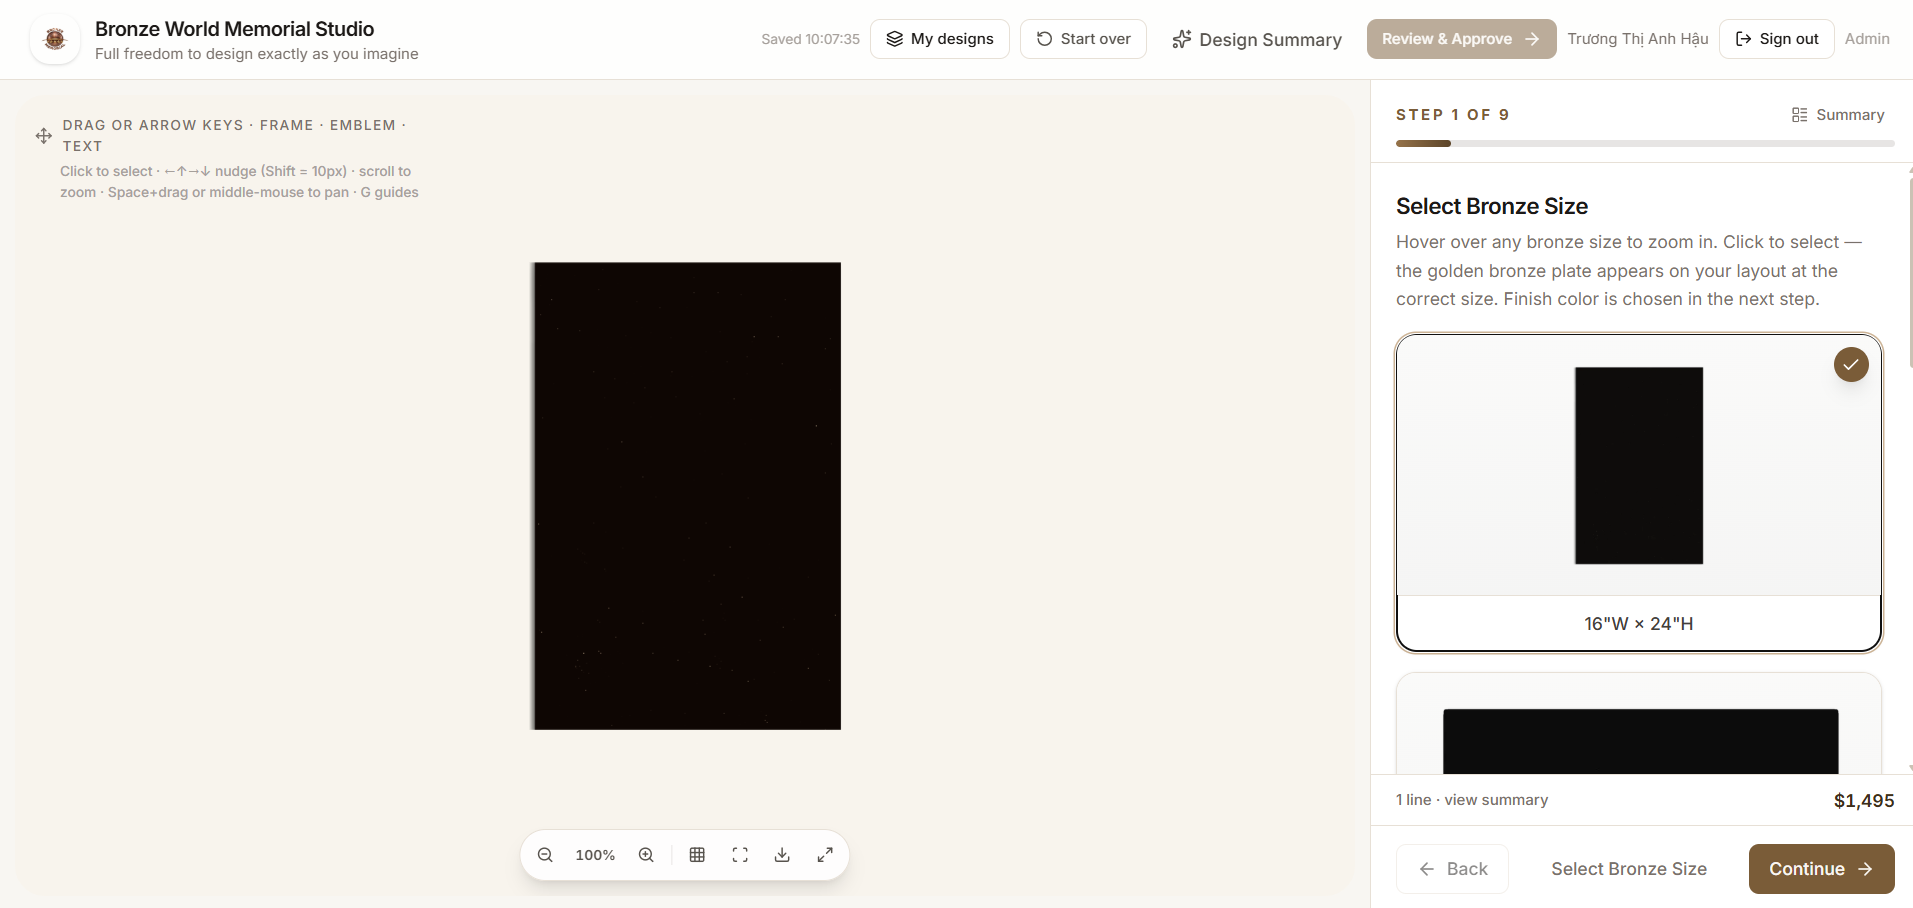
Screen 1: Select Bronze Size
Hover over any bronze size to zoom in. Click to select — the golden bronze plate appears on your layout at the correct size. Finish color is chosen in the next step.
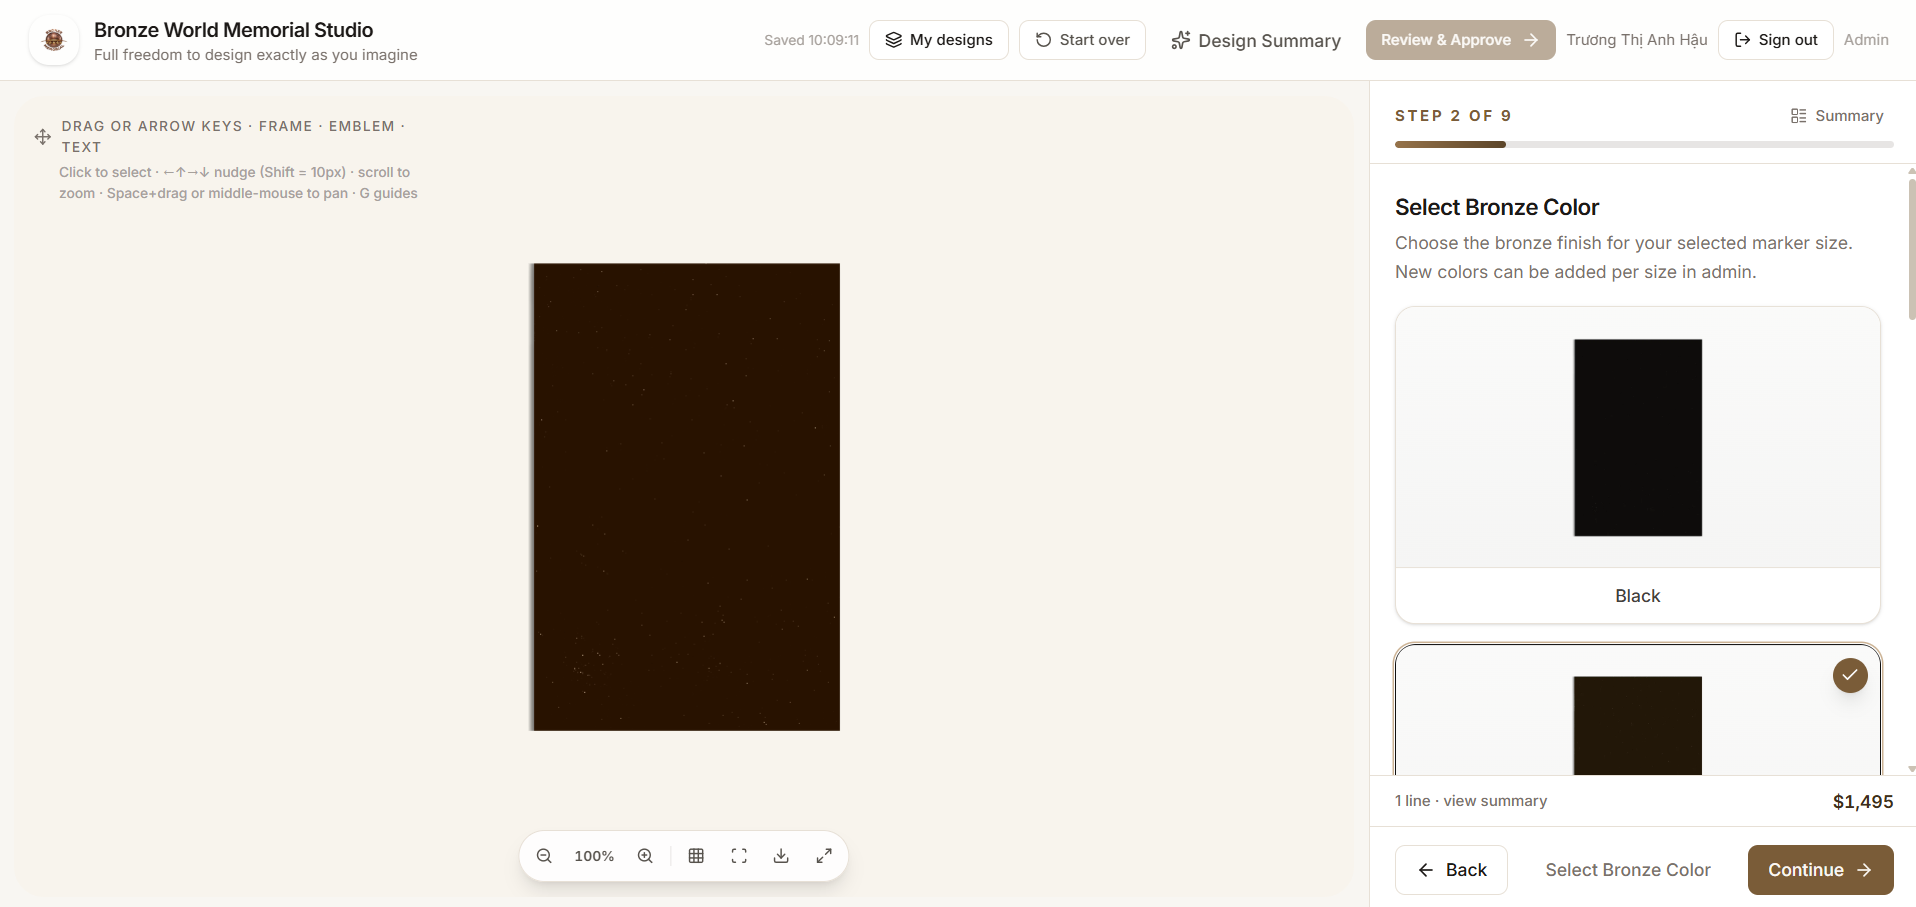
Screen 2: Select Bronze Color
Choose the bronze finish for your selected marker size. New colors can be added per size in admin.
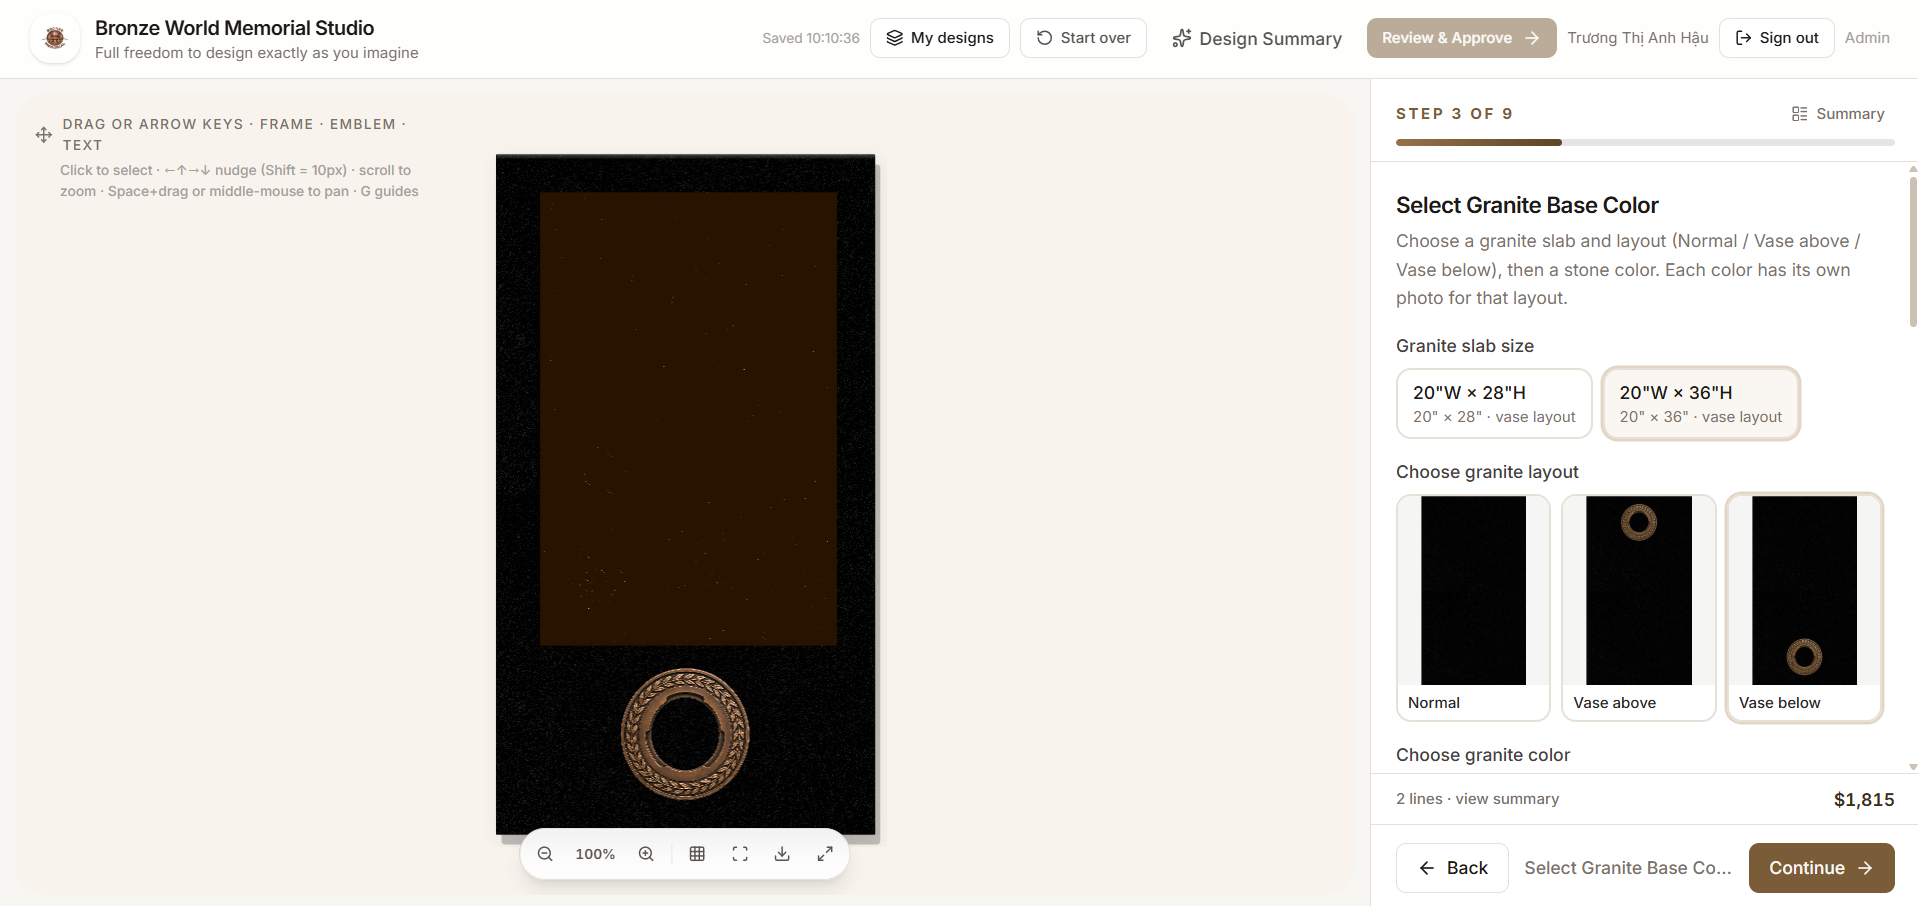
Screen 3: Select Granite Base Color
Choose a granite slab and layout (Normal / Vase above / Vase below), then a stone color. Each color has its own photo for that layout.
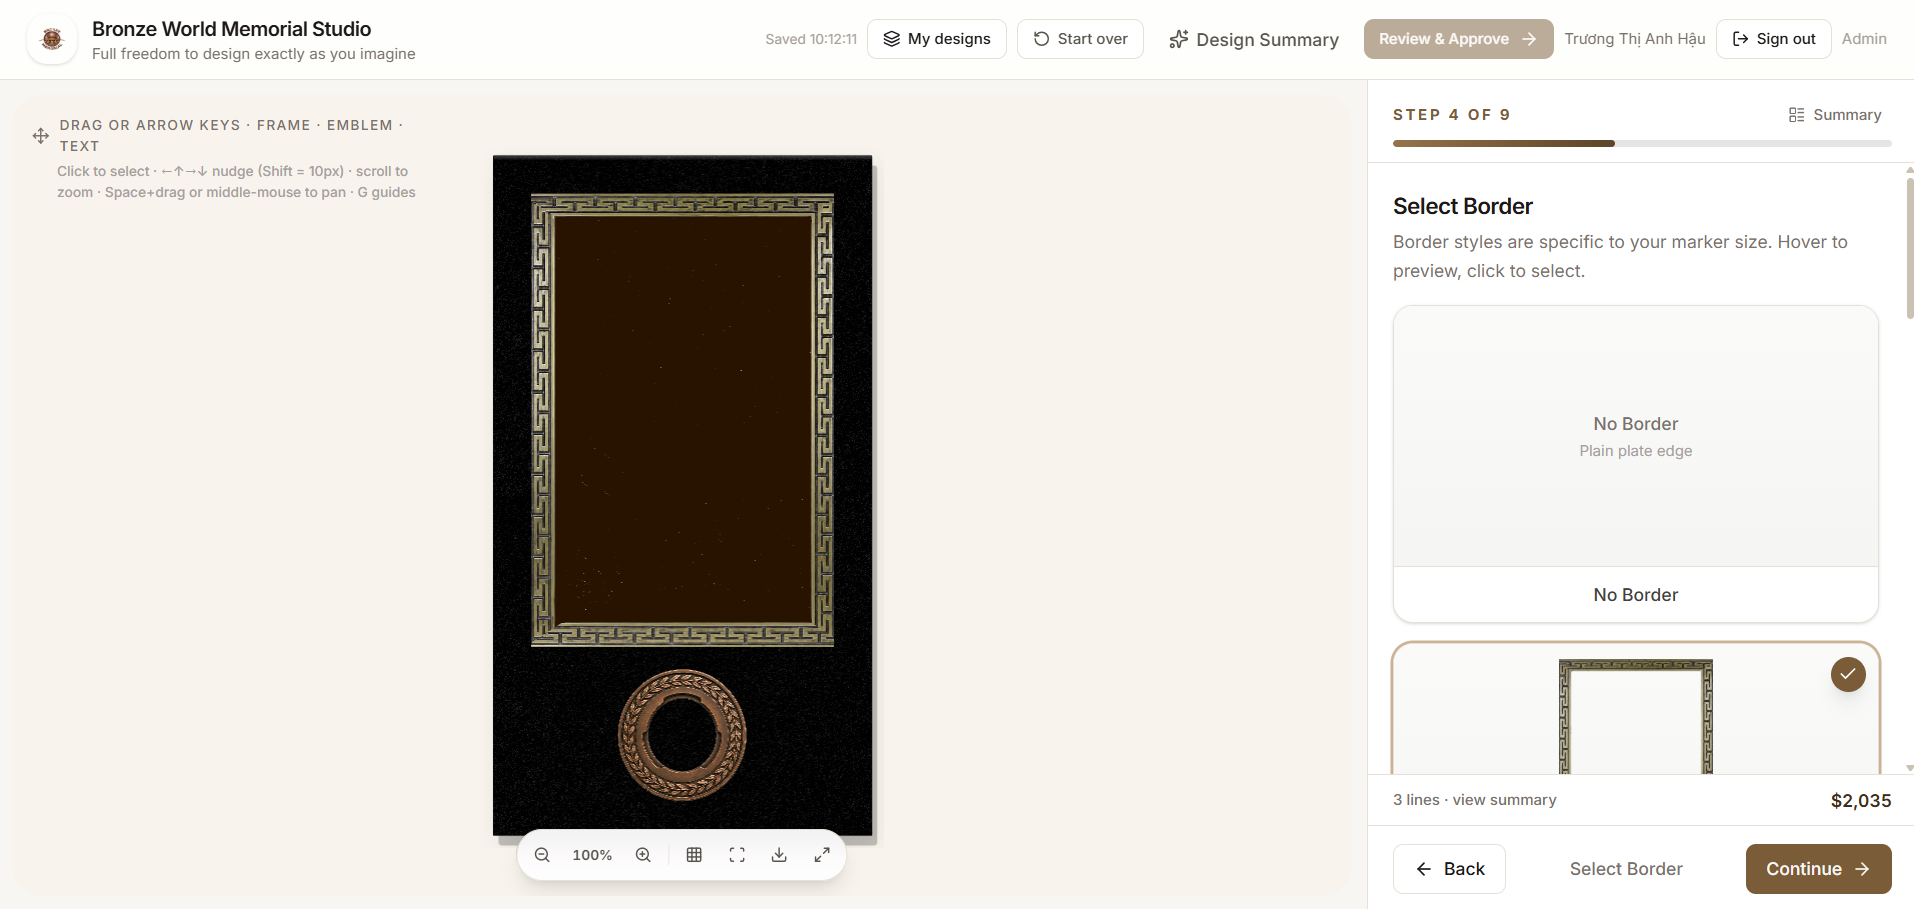
Screen 4: Select Border
Border styles are specific to your marker size. Hover to preview, click to select.
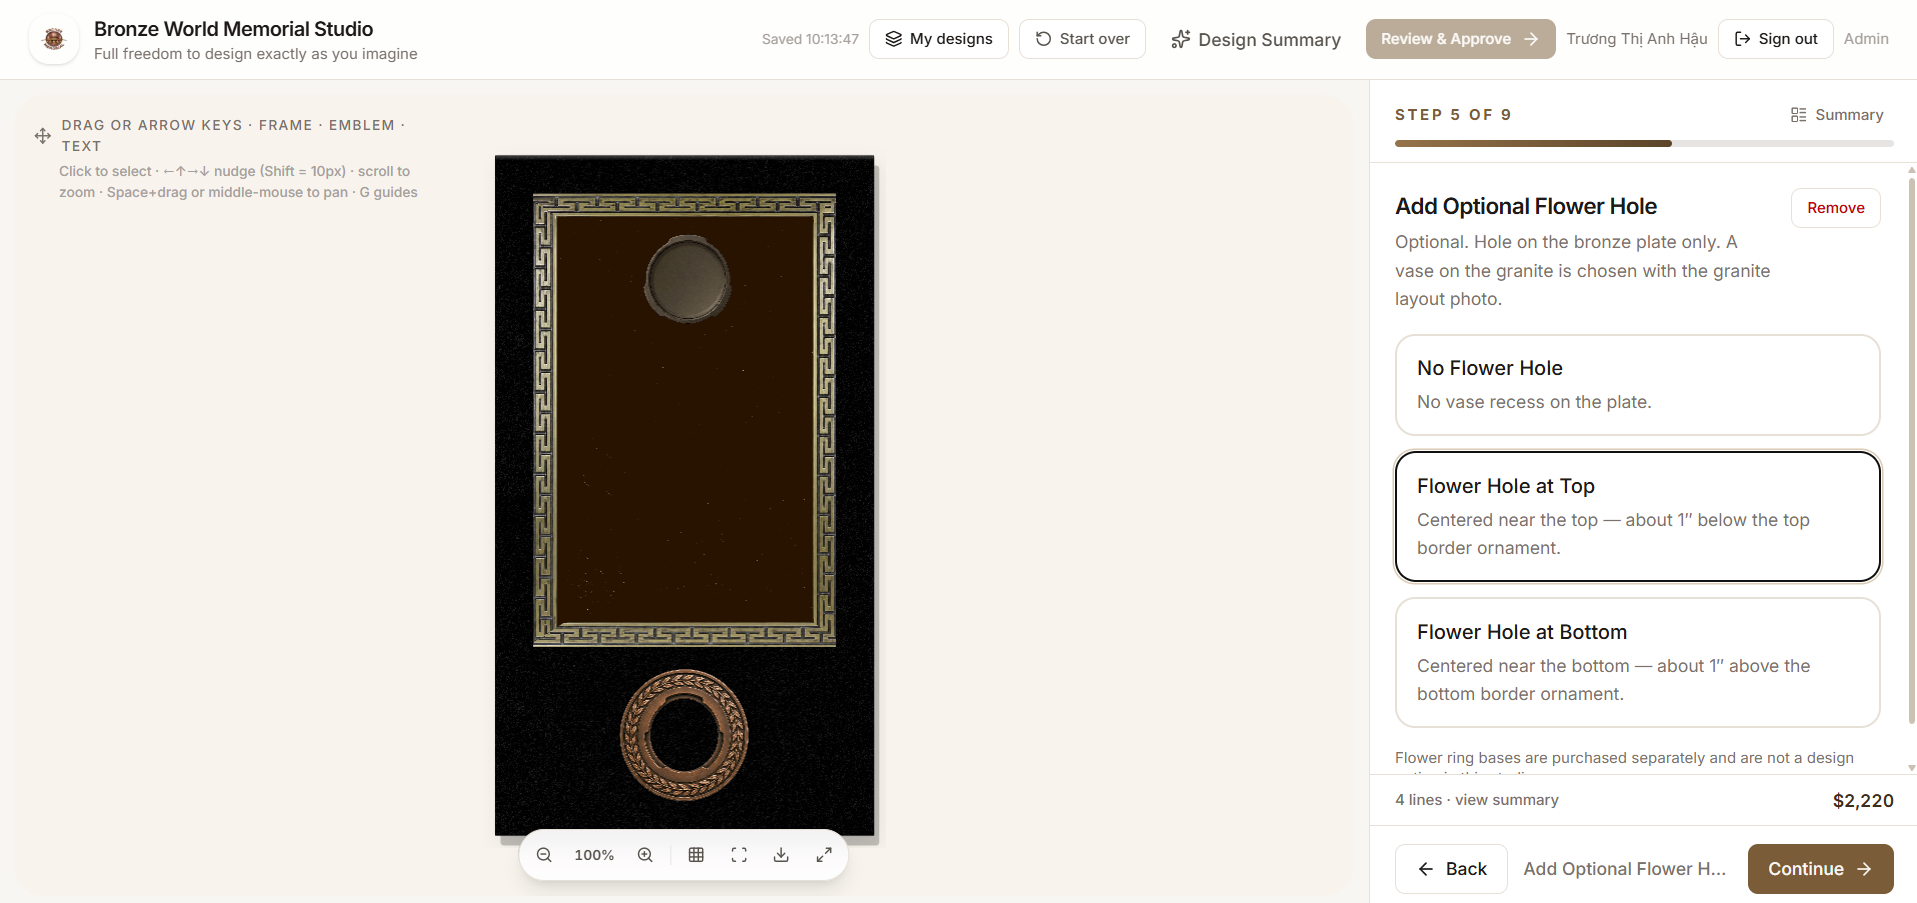
Screen 5: Add Optional Flower Hole
Optional. Hole on the bronze plate only. A vase on the granite is chosen with the granite layout photo.
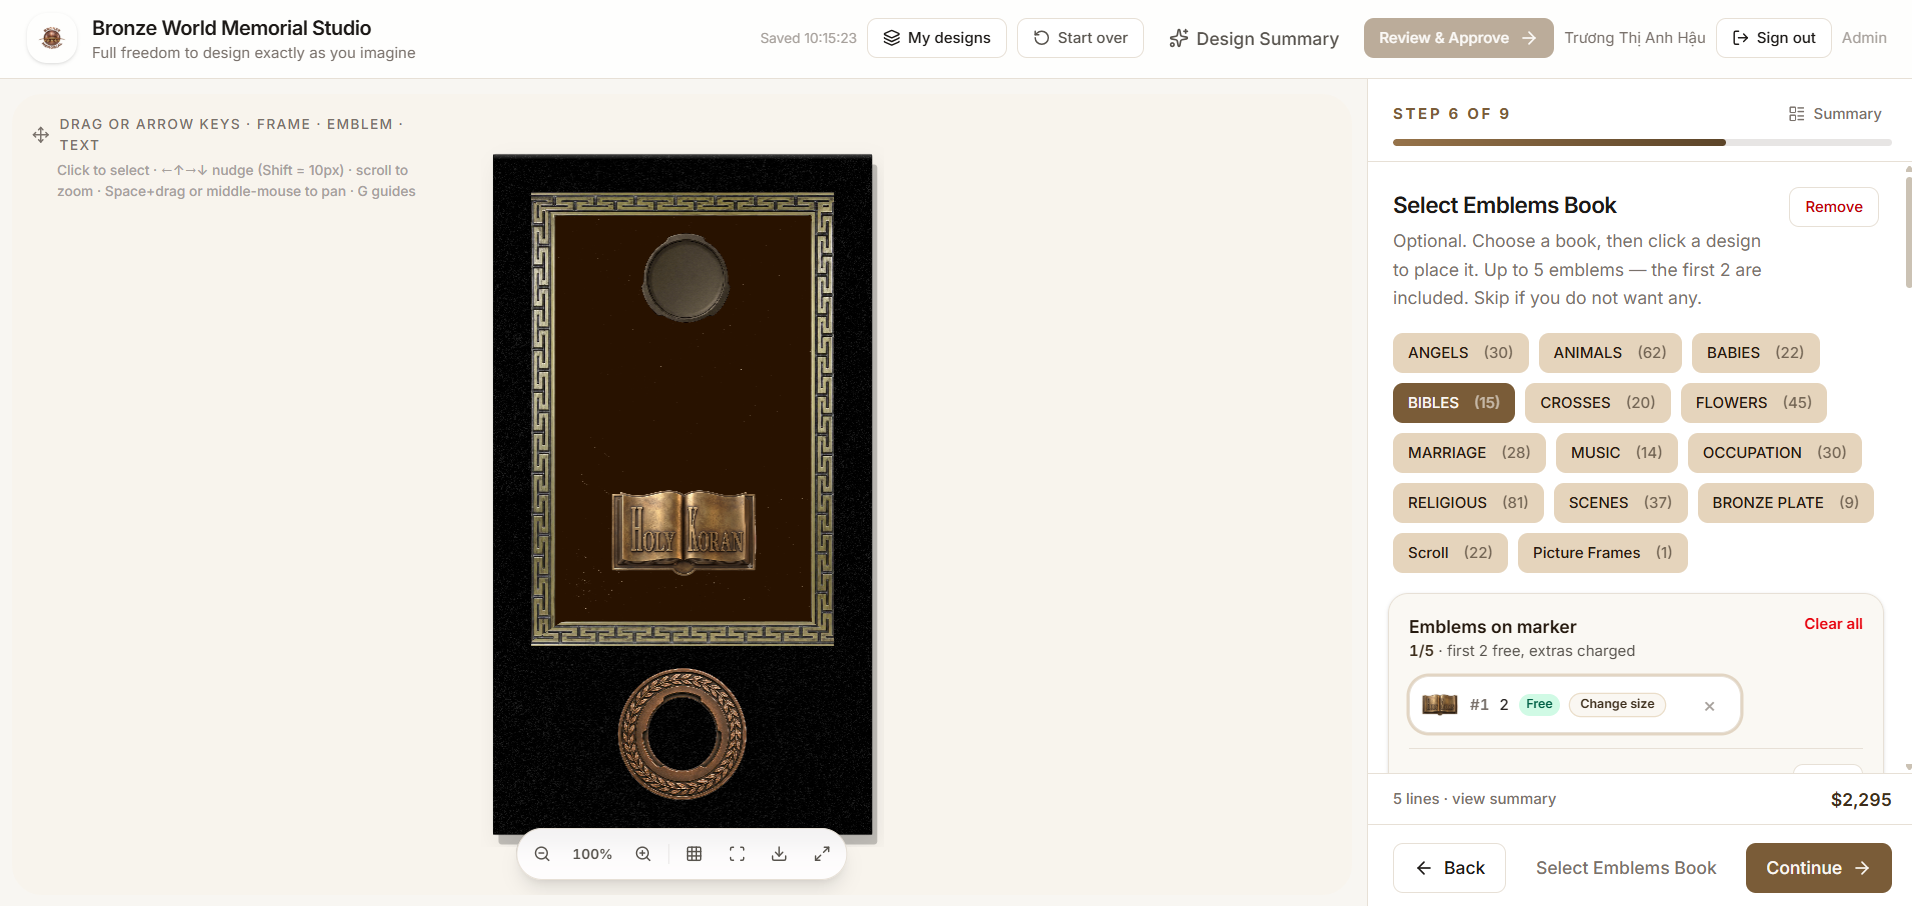
Screen 6: Select Emblems Book
Optional. Choose a book, then click a design to place it. Up to 5 emblems — the first 2 are included. Skip if you do not want any.
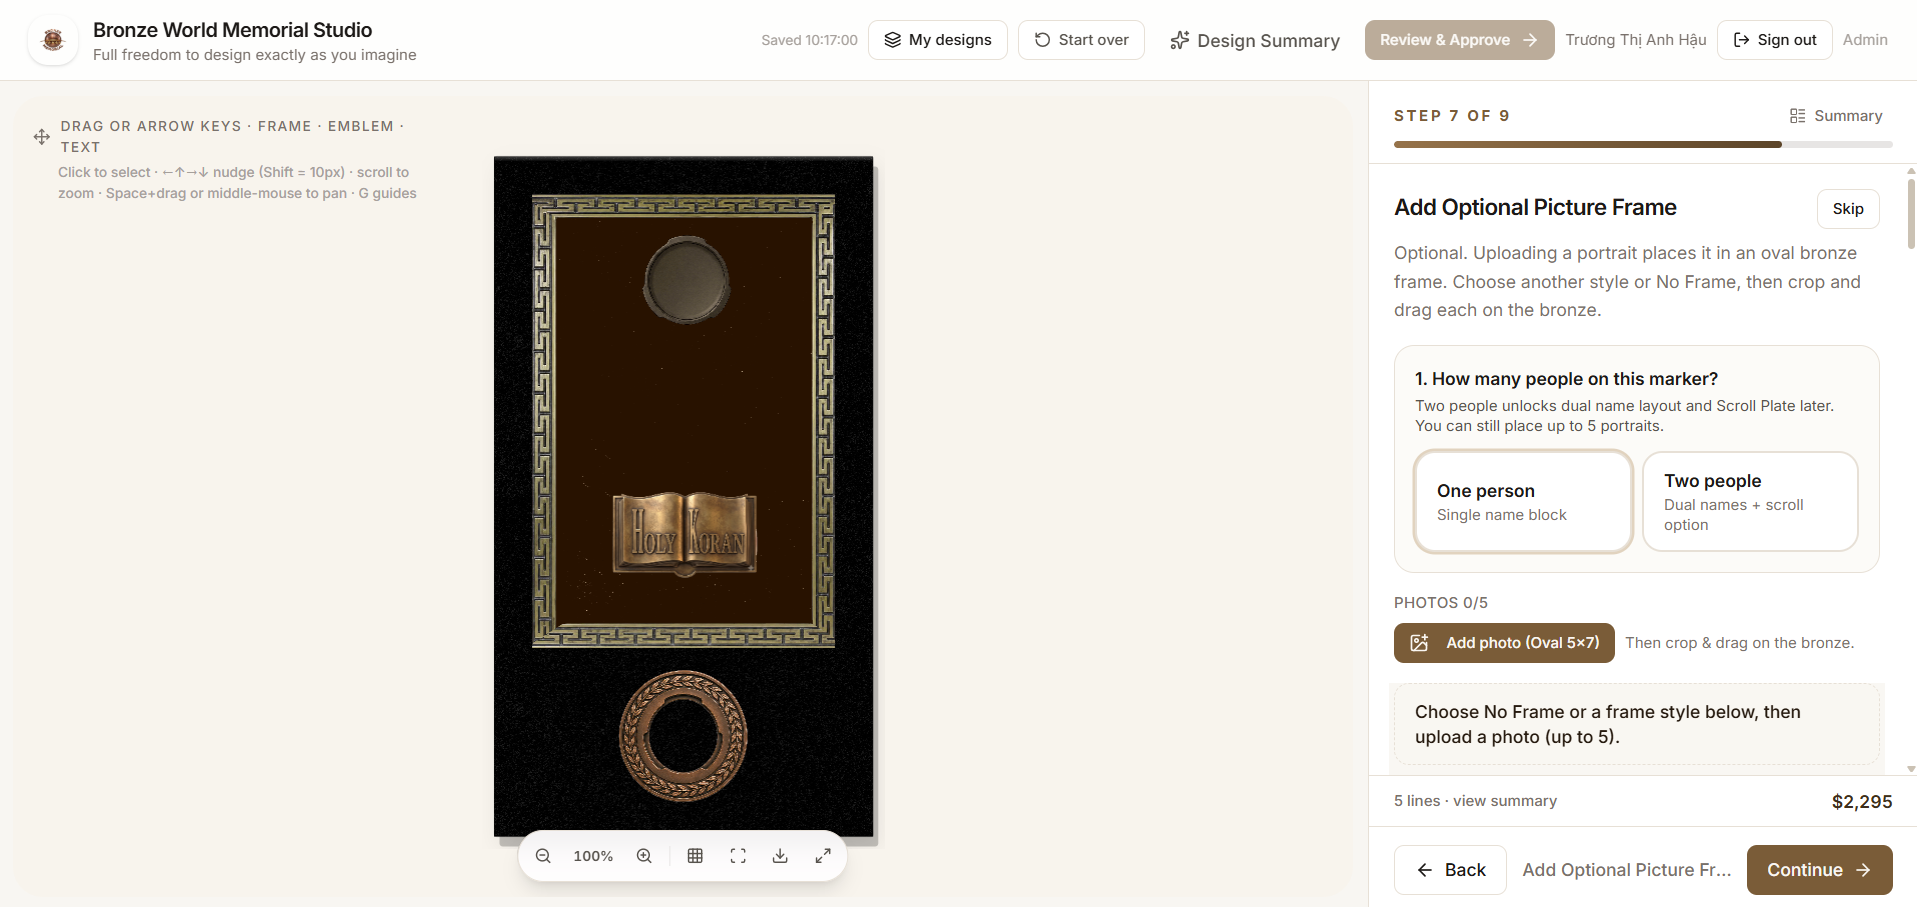
Screen 7: Add Optional Picture Frame
Optional. Uploading a portrait places it in an oval bronze frame. Choose another style or No Frame, then crop and drag each on the bronze.
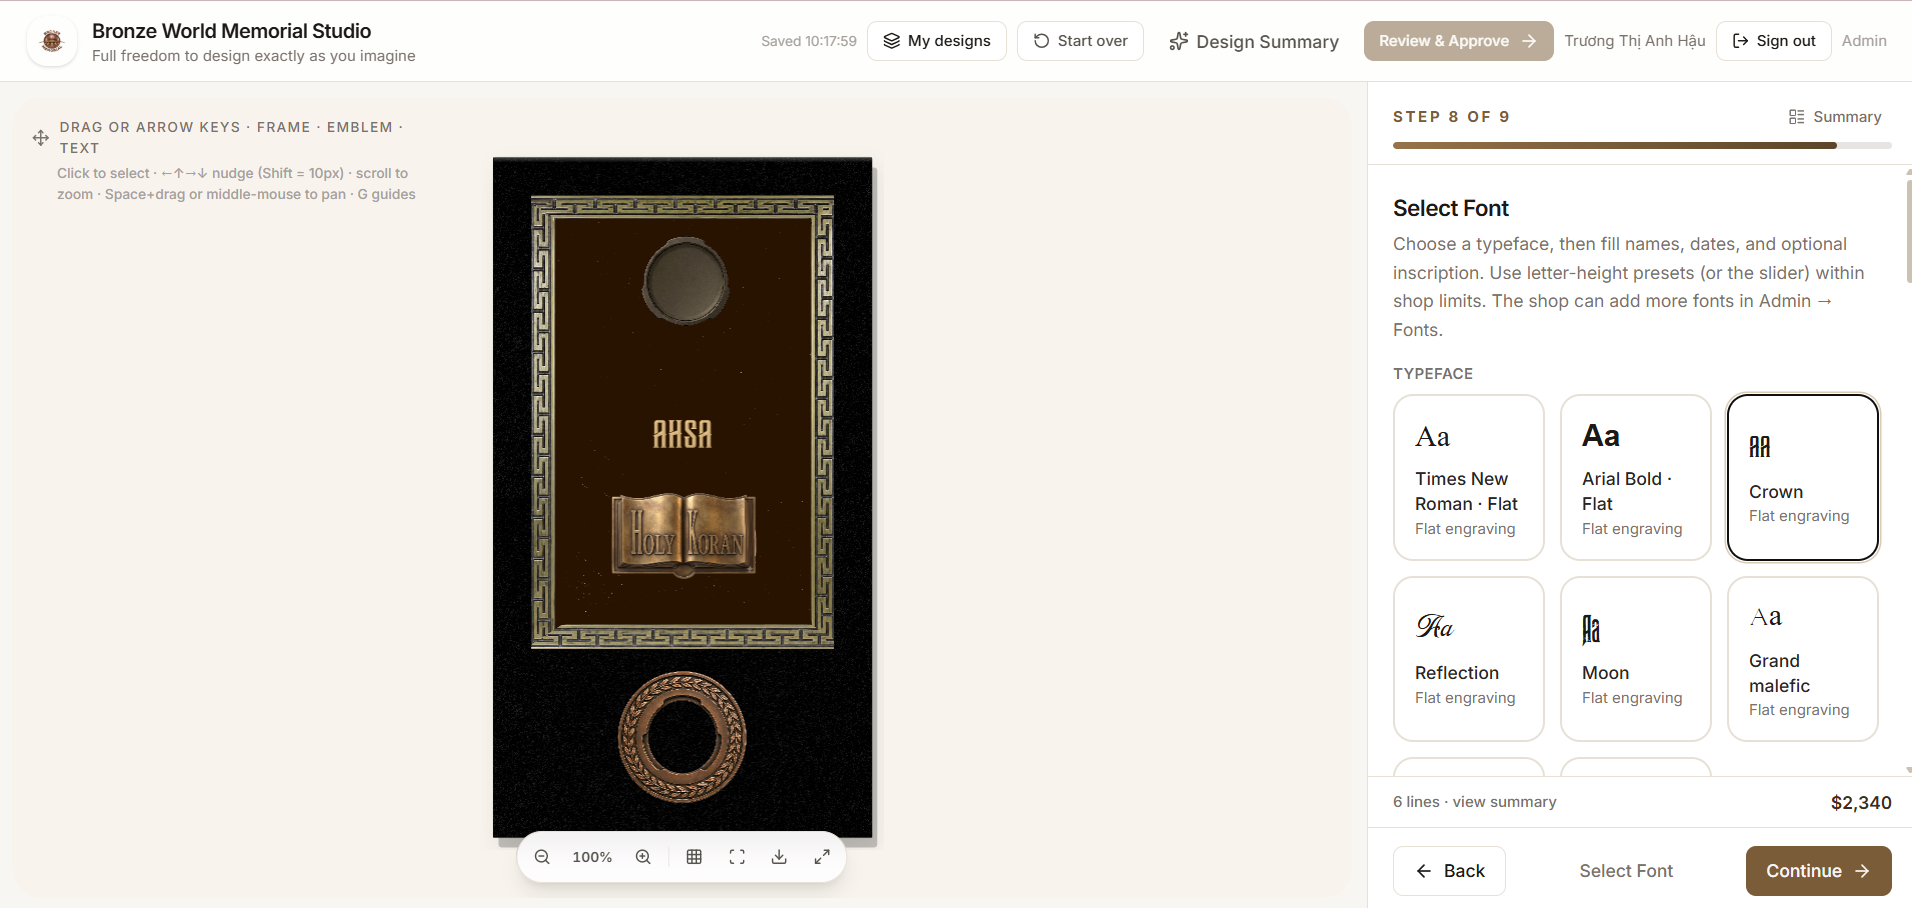
Screen 8: Select Font
Choose a typeface, then fill names, dates, and optional inscription. Use letter-height presets (or the slider) within shop limits. The shop can add more fonts in Admin → Fonts.
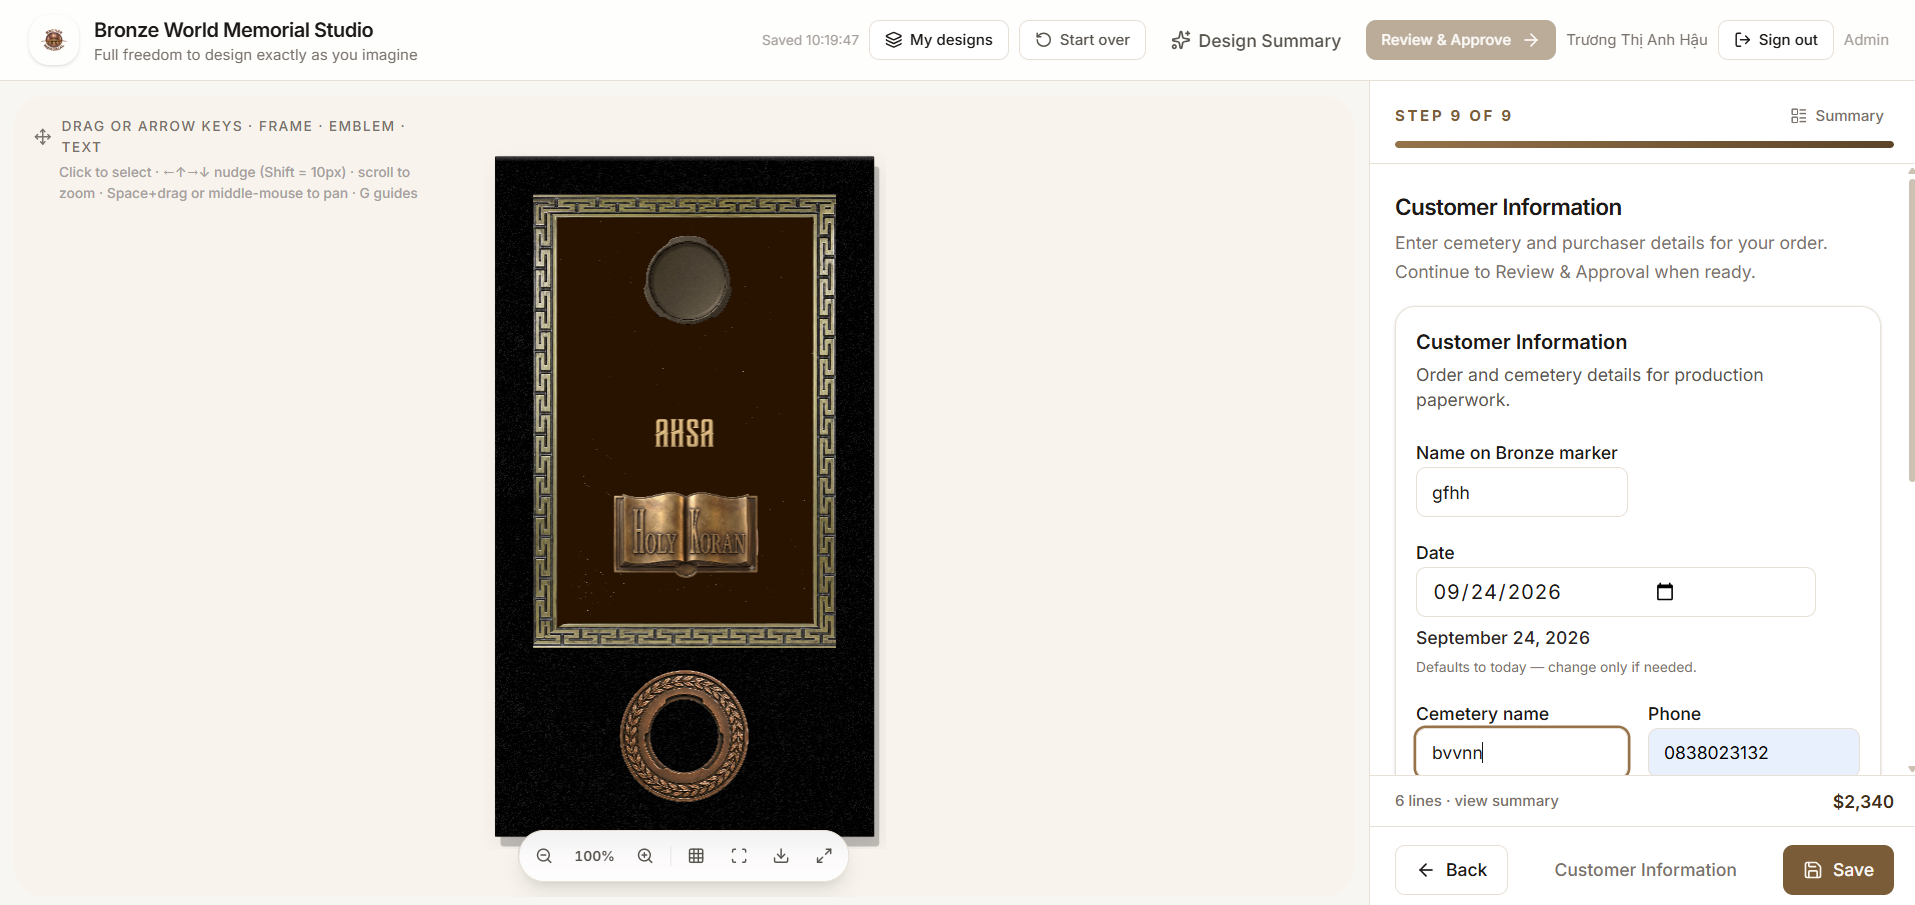
Screen 9: Customer Information
Enter cemetery and purchaser details for your order. Continue to Review & Approval when ready.